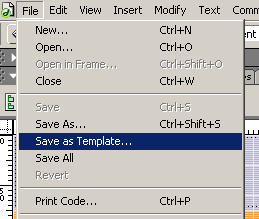
Q. Why would I want to use a nested template? A. The nested template gives you the ability to maintain global control over your site while providing the option to alter specific content on specific pages. Nested templates- Part OneAuthor: jojo The nested template option.What does it do? What is it for? The answer is simple, it allows us to be more specific in the content we want to be available within a given section. It allows us to do this by providing us with the ability of creating a page from a template and modifying it, it then allows us to save that document as a nested template. Lets begin, to make things easy I've pre-made all the files you will need to work through his tutorial, please download them from here Unzip them to your working directory or any directory of your choice and define your site to suit. I am going to assume that you know how to define a site and assume that you have now done that. In the root of the site you will find our basic page, it has some content but is not related to a template in any way at all. We will begin by selecting this file and clicking the open button. We should now have our file open in design view. Making the "Master" templateFrom the file menu we need to select File» Save as Template, lets do that now.
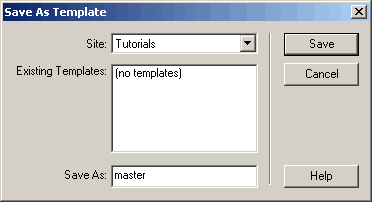
We will then be prompted to name the file from the dialog box below, call it master and save it.
Our next step is to give the template an editable region. Click inside the table that contains the Latin text filler and select the <table> tag on the Dreamweaver MX status bar as shown below.
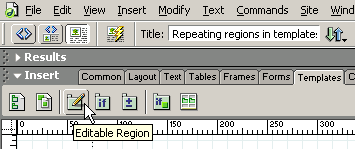
Now we can select the "Templates" tab from the Insert Panel and click the "Editable Region" icon on the Insert bar like below.
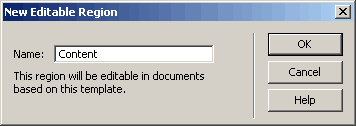
This produces a dialog box requesting that you name your editable region, lets call it "Content" and make the change like below, click OK.
We now have what we would consider a normal template under DW 4 and UltraDev 4, however Dreamweaver MX takes the templates functionality and improves it greatly. On the next page we will look at the nested region and the added functionality it gives us. Save your document and close your master template, leave your Dreamweaver MX workspace empty. |
::This page last modified 8/13/2013 at 03:37::
 |
Copyright
© 2001-2025 DreamweaverFAQ.com All Rights Reserved. All brands, trademarks, tutorials, extensions, code, and articles are the property of their respective owners. A production of Site Drive Inc. Legal Notice | Privacy Policy | Disclaimer & Notice
|
 |


