|
Q. How can I nest tables in Layout View? I try to insert a nested table but I am unable. A. You may only nest tables in Layout view if the table cell is completely empty. Empty cells are indicated in gray and displayed in the code as <td></td>. Important: Do not leave any empty table cells. Netscape may have problems rendering the table properly. For a step by step guide to Nesting Tables in Layout View see the tutorial below. Nesting Tables in Layout ViewAuthor: Angela
C. Buraglia IntroductionLayout View is new to Dreamweaver 4. You can toggle back and forth between Standard View and Layout View by using the buttons at the bottom of the Object Panel. Remember, you can toggle between views as often as you like. You may also change views from the menu. For general knowledge about Layout View, check out: How to Use the Dreamweaver 4 Layout View The DownloadDownload the HTML files used in this tutorial to follow along. The Steps
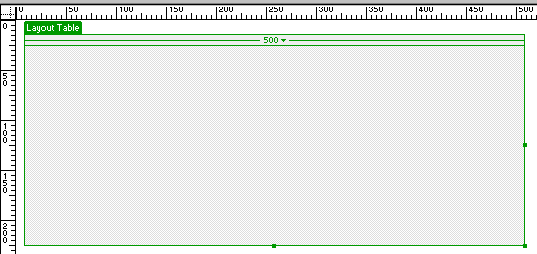
Draw a Layout Table. To draw a layout table first select the Draw Table button.
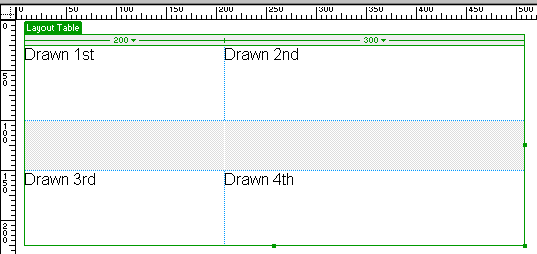
Draw your layout cells using the Draw Layout Cell button. Do not draw cells where you intend to put a nested table. Drawing cells is very much like using the slice tool in Fireworks. As you draw each cell the additional cells needed to complete the table will be automatically added for you. Tip: Hold the Control key (Ctrl) on PC (on Macintosh Command key) while clicking and dragging to insert multiple cells. . Pay close attention, this part is very important: Cells which you have drawn appear white and produce the code: <td> </td> Drawn cells are held open by , a non-breaking space. They are not empty cells. Cells which you have not drawn, (cells which Dreamweaver automatically inserts to complete a table) appear gray and produce the code: <td></td> There is nothing between the two tags to hold the cell open. It is a truly empty cell. Important: Empty (gray) table cells can cause problems in Netscape and should be completely avoided. To ensure against this, always add something between the <td></td>. Something can be a non-breaking space (as shown above), a table, an image, text you wish to contain in the cell, or whatever else works for you. Just don't leave it empty (gray)!
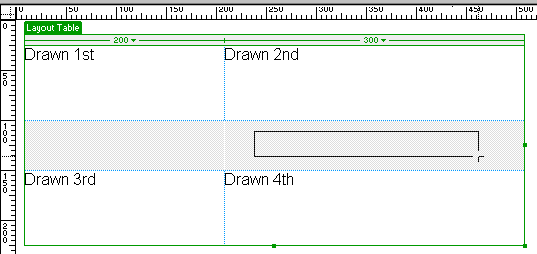
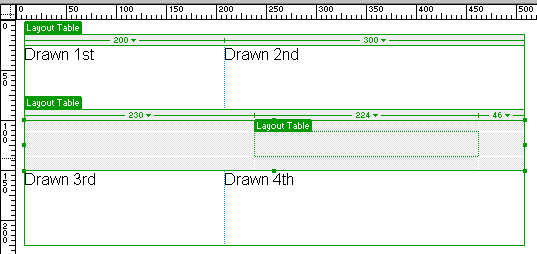
You can only add a nested table to a truly empty cell (indicated by being gray) within Layout View. Click on the Draw Table button. Draw a table in the gray area as shown below.
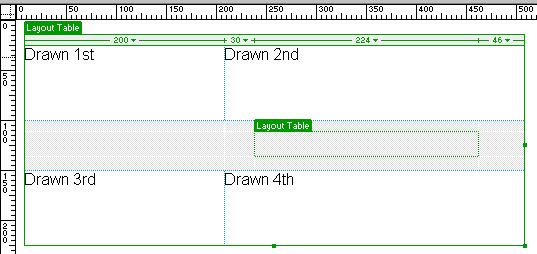
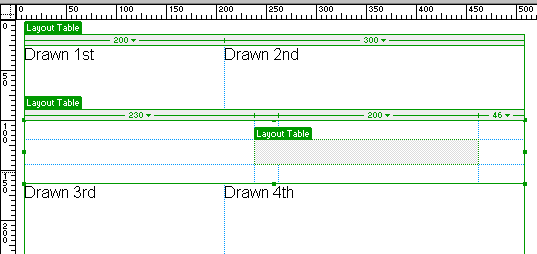
Trapping Tables and Removing Nested TablesTip: You can trap other tables and/or cells as shown below. Notice there is a new table added which now holds the nested table you previously added.
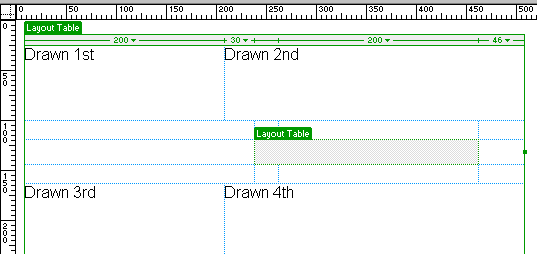
Like magic, the trapping table disappears!
|
::This page last modified 8/13/2013 at 04:37::
 |
Copyright
© 2001-2026 DreamweaverFAQ.com All Rights Reserved. All brands, trademarks, tutorials, extensions, code, and articles are the property of their respective owners. A production of Site Drive Inc. Legal Notice | Privacy Policy | Disclaimer & Notice
|
 |
