|
Q. How can I get my page to center horizontally regardless of screen resolution? A. By using frames to compensate for the differences in screen dimensions. The "Letterbox Frameset" makes this task much easier. You can also do this manually with some help from Dreamweaver. Using Frames To Align Page Content- Method OneAuthor: Bryan
Ashcraft Question 1: What are Frames and Framesets?A frameset is a collection of frames. This can be as small as 2 frames, or as large as, well...., as large as you care to make it (just remember the content of each page must be loaded and will contribute to the total page weight). Now a frame is a section of a page that contains another pages content. Let me see if I can explain that better. Look at it as a TV with Picture-in-Picture. The main screen is your frameset. Inside this frameset there are a minimum of 2 frames, each showing its own content. Did that help? Have you figured out that a frameset will require at least three pages? i.e., Say you want your navigation to be visible at all times. You could do this with a frameset (page1) that contained a left frame and a right frame. The contents of your left frame would be a navigation page (page2) and the right frame would hold your content page (page3). See its not as confusing as you thought. Just remember that a frameset is a page unto itself and its contents must be provided from other pages. If you would like a more detailed explanation of frames and how to use them, see Trent Pastrana's tutorial on Using Frames. Question 2: How do I use them to align my content?To try and make this as universal as possible, I decided to provide you with two methods that will accomplish the same goal. Method 1: Using the "Letterbox Frameset" extension from Project VII. This is probably the easiest method. If you plan to use layers to hold your content, this is the only way to center your content horizontally with frames. Method 2: Manually creating the frameset with Dreamweaver's included objects. This method will use objects that come with DW and a little hand coding. Relax, its only a couple of lines and very easy to do. Click Here For The Manual Method. Using The "Letterbox Frameset" ExtensionFirst I like to create my content pages. For this tutorial we will be using the following: border.htm- This page will contain what we want
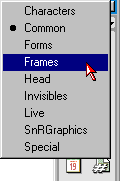
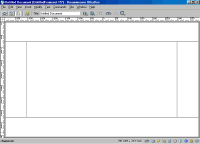
to use to surround the actual content on our site. Creating The FramesetNow that we have our border and content pages created, we are ready to create the frameset to house them.
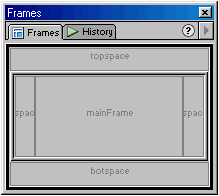
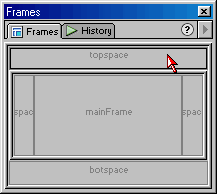
Setting The Properties Of Our FramesetNext we want to select each frame and tell it what its source should be. To
do this simply click inside each section in the "Frames" palette and
use the "Property Inspector" to set its source.
All that is left to do is set dimensions of our "mainframe" and we're done! To do this we need to know how big our content.htm page is from top to bottom and left to right. Or, at least how much of the page we want to show. I have used the "Paragon Visuals" logo for my page's contents. The measurements are width= 392 and height= 420. OK. Let's finish this thing! To set our dimensions we need to select each **frameset** from the "Frames" palette Then using the "Property Inspector" we will set the dimensions. 1. Select the outer frameset from the "Frames" palette Tip* To select the nested frameset, click on the thick outer border that surrounds the three middle sections in the "Frames" palette. That's all there is to it! The ExamplesRelated TutorialsUsing Frames To Align Page Content-
Method One: Using the "Letterbox Frameset" Extension Creating and Managing Framesets in Dreamweaver Available Extension(s)The following extension(s) can be found at the Macromedia Exchange by searching the word Frames. "Letterbox Frameset" by Project
VII |
||||||||||
::This page last modified 8/13/2013 at 04:37::
 |
Copyright
© 2001-2025 DreamweaverFAQ.com All Rights Reserved. All brands, trademarks, tutorials, extensions, code, and articles are the property of their respective owners. A production of Site Drive Inc. Legal Notice | Privacy Policy | Disclaimer & Notice
|
 |


